
While we’ve covered some very exasperating things relating to computers so far, perhaps the most is not being able to see what you’re doing. If seeing truly is believing, it’s sometimes easier said than done when working on a computer. While there is a balance between optimizing your display and being able to read the fine print that shouldn’t really be that fine, today you’ll learn an easy way to change your view and eliminate the headaches and eyestrain from your daily life.
First, a word about resolution. All the rage in 2019 is “4K Ultra HD”. 4K refers to the display’s resolution. Every monitor, be it a computer monitor or television, has a picture which is comprised of tiny dots called pixels. The expression of the number of horizontal pixels multiplied by the number of vertical pixels is known as the resolution. The computer at the home office has a resolution of 1920 x 1080 for a total of 2,073,600 pixels. Because of this, my monitor is referred to as Full HD or 1080p. A 4K screen has a resolution of 3840 x 2160 for a total of 8,294,400 pixels. As you can see, 4K has approximately four times as many pixels as 1080p or Full HD, the previous image standard. The more pixels there are in a picture, the better the quality. So, you’ll always want to be sure that your computer (and television) is utilizing the highest resolution possible. The directions to check/set yours are the same in Windows 7 and 8: Right-click on an open area of the desktop, then click on “Screen resolution”. Click on the dropdown arrow to the right of “Resolution”, then click and drag the slider as high as it will go. Click “OK” and you’re done. In Windows 10, right-click on an open area of the desktop, then click on “Display settings”. Click on the dropdown under “Resolution”, and click on the highest numbered resolution at the top of the list. In all versions of Windows you’ll notice the screen size change, and then you’ll be asked whether you want to keep the changes or revert back to the old size. Click on “Keep Changes” to complete the resolution change.
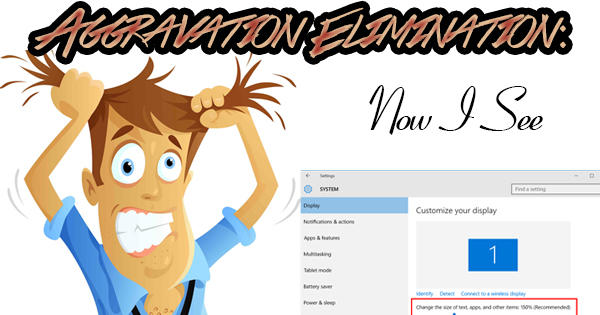
Now that our resolution has been set, you’ll probably see that everything has gotten pretty small. Don’t panic! In the old days, most of us would change our computers to a lower resolution to make everything larger, but since displays have come so far, we don’t want to limit our image quality. Fortunately, Microsoft felt the same way, and included a screen magnification setting (display scaling) that will change the size of everything you do on your computer. In Windows 7 and 8, again, right-click on an open area of the desktop, then click on “Personalize”. Next, click on “Display” on the bottom left of the window that appears. You’ll see the heading “Make it easier to read what’s on your screen”. By default, your screen size will be at 100%. Click on “Medium – 125%” and then click “Apply”. Click on “Log Off Now” to restart the computer and allow the changes to take effect. If the display is still too small, repeat the steps above and choose 150%. 125% is plenty in most cases. In Windows 10, right-click on an open area of the desktop, then click on “Display settings”. Click on the dropdown under “Change the size of text, apps, and other items”, then click on “125%”. You’ll notice an immediate change, but it’s advisable that you restart your computer to make sure everything has been switched to 125%.
With as much time as we spend on computers, it’s very important to be comfortable. Eye strain is serious, but can be avoided with a couple clicks of the mouse. No more do you have to change the zoom settings of individual programs, nor do you have to sacrifice image quality to ward of blindness. For once, Microsoft has eased our aggravation thanks to display scaling!