
Microsoft’s Windows 10 is the latest (and greatest) operating system on the market today. After a Windows 8 that was met with less than rave reviews, Microsoft rolled up their sleeves and went to work. They created an operating system that combined all that was good with Windows 7, and added those features to the innovative Windows 8 to make for a much more user friendly and customizable experience. Like anything in the world of technology, it isn’t perfect, though, and problems have reared their ugly head. One of the most frequent occurrences is a computer that slows to a crawl and is essentially “locked up”. The first thought is always, “Do I have a virus?” The second one is usually, “Is something wrong with my computer?” Well, yes and no. We’ll try to shed some light on what might actually be happening to your Windows 10 computer.
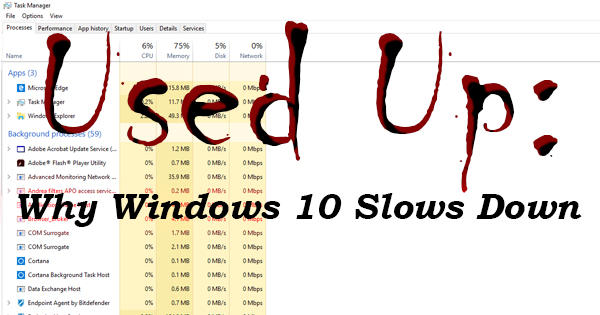
One of the most handy programs on any Windows computer is the Task Manager. Task Manager was first introduced to users back in 1996 with its incorporation into Windows NT 4.0. I can hear you saying, “Enough with the history lesson, Justin, why is it important?” I’m glad you asked! It’s important because it details the current load on the computer. In Windows 10, Task Manager displays a list of programs (now called “Apps”) and processes that are currently running on the computer. Many of the processes are running in the background and you’re not even aware that they are. Even though you don’t know they’re running, your computer does, because they’re using your system’s available resources. You can also choose which programs you’d like to load automatically when you log into your computer by either enabling or disabling them after clicking the “Startup” tab. To open Task Manager, right-click on the “Start” button in the lower left of your screen and left click “Task Manager”. What we’re interested in today is the top bar which reads: “CPU”, “Memory”, “Disk”, and “Network”. A percentage currently being used (out of 100) is shown, and each App or process is listed with it’s contribution to that percentage. Apps or processes that are using a lot of resources are shown in a darker yellow or orange, with the largest system drains depicted with a red box. Click “CPU”, “Memory”, “Disk”, or “Network” to list each process by usage, highest to lowest, or click again for lowest to highest. Please note that it’s normal for these numbers to fluctuate. Not surprisingly, the higher the percentages, the slower performing your computer is. What I’ve been finding with many Windows 10 computers is a “Disk” usage stuck at 100% essentially paralyzing the computer.
What is disk usage? Disk usage is the percentage of computer storage currently in use. When your computer is busy loading or saving files to and from your hard drive (or USB flash drive or external hard drive), the disk usage will climb. When a computer is at rest with no programs currently open, the percentage should be right at 0% disk usage. If you’re seeing 100% disk usage with nothing open, and a computer that is basically unresponsive, it’s a problem, and a pretty common one. To rectify the situation, I’ll share a few tips that have helped me along the way. There’s really no rhyme or reason to why this happens to one computer and not another, so try one of these suggestions and see if it helps you. If it doesn’t, move on to the next one and keep trying!
First, head for Cortana’s search bar (the bar that says “Search for anything”), and type “services.msc” (without the quotation marks). Press “Enter”, and all of Windows Services will appear. Scroll down until you find “Windows Search”. Double click on it, and then click “Stop” in the window that appears. Click the dropdown arrow to the right of “Startup type” and click “Disable”, then click “OK”. Check your work with Task Manager, and if that didn’t help, return to Services again, and look for “Superfetch”. Complete the same steps as you did for Windows Search: Stop the process from running, then disable it from starting up with Windows. Again, check Task Manager and see if that helped. If not, we’ll change our virtual memory settings. Right-click the “Start” button again, but this time, choose “System”. Click “Advanced system settings” on the left, then click the “Advanced” tab in the System Properties window. Under the “Perfomance” heading, click “Settings”. Click the “Advanced” tab, and under the “Virtual Memory” heading, click “Change”. Before we go further, you’ll need to know how much physical memory your computer has. If you’re not sure, click on the “System” window that’s now two windows behind the Virtual Memory window we’re working in. Look for “Installed Memory” and you’ll have your answer. Go back to the Virtual Memory window, and uncheck the box that says “Automatically manage paging file size for all drives”. Click the radio button for “Custom size” and we’ll enter the same number for both the minimum and maximum sizes. What number should we enter? Take the amount of RAM installed on your computer, then multiply it by 1024, and multiply that by 1.5. For example, if you have 8 GB of memory installed on your computer, it would look like this: 8 x 1024 x 1.5 = 12288. Enter your number into the blocks, then click “Set”, and finally, OK”. One last step: type “File Explorer” in the “Search for anything” search box. Click “Local Disk C:” (or whatever letter your hard drive is), then double click on “Windows”, and lastly, double click “Temp”. Click “Home” at the top of the windows, then click “Select All”. Press the “Delete” key on your keyboard to remove temporary files from your computer.
Sorry for the long-winded post, but this is a recurring problem with Windows 10 that is extremely frustrating. I hope this helps, because when your computer is slow, it’s resources aren’t the only thing being “Used Up”…your patience is too!