
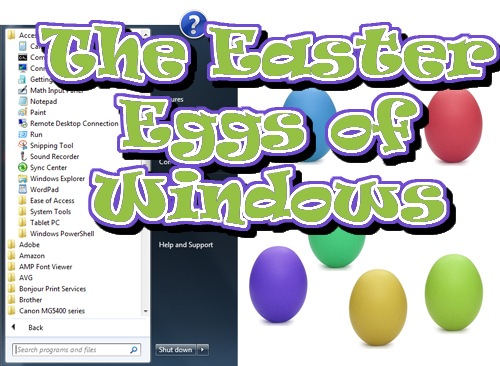
No, not those kinds of Easter eggs! In the world of technology and entertainment, often developers will sneak a little extra something into their software, game, movie, etc. that isn’t easily discoverable. This may include an image, piece of text, or even a hidden application or game in a seemingly unrelated piece of software. By definition, applications like the Snipping Tool, Magnifier, Paint, On-Screen Keyboard, and Math Input Panel aren’t Easter Eggs because they’re clearly identified by Microsoft, but since many people aren’t aware of their existence, and since yesterday was Easter, we’ll call them that. I look forward to your angry e-mails. Let’s take a look at a few very useful tools you can add to your toolbox.
Most people know how to take a screen shot. If you click the PRINT SCRN key on your keyboard, an exact copy of what appears on your screen at that moment will be saved into the computer’s memory. From there, you can paste it into your favorite word processing or image editing program and save it to the hard drive for posterity. But what if you only wanted a portion of something on the screen and not a copy of the entire screen? Use the Snipping Tool! The Snipping Tool is easy to use and offers several of its own tools. Simply click and drag the left mouse button around whatever you’d like to save on your screen, and it will appear in a new window. From there, you can save it to the hard drive, e-mail it to a colleague, copy it and then paste it into a word document, highlight a section of the “snippet”, or even write (using your mouse) in the pen color of your choice. Not bad! To find the Snipping Tool in Windows 7, click “Start”, “All Programs”, “Accessories” then “Snipping Tool”. In Windows 8, click the magnifying glass and type “Snipping Tool”.
Are you trying to take my advice of always making sure to “Always Read the Fine Print” (shameless plug) but you can’t quite read it because it’s a little too fine? The Magnifier is just what the doctor ordered. It’s exactly what it sounds like – a magnifying glass for your computer screen. The Magnifier can zoom whatever program you’re using from a view of 100% all the way to 1600%. There are three ways to use it: “Full screen” which makes your entire screen zoomed to the desired level, “Lens” which is a free moving box where only the things that are currently in the box are zoomed, or “Docked” which displays what you’re currently hovering the mouse over in a short box that stretches the width of your screen. Options are available by clicking the gear icon in the window. To launch Magnifier in Windows 7, click “Start”, “All Programs”, “Accessories”, “Ease of Access”, then “Magnifier”. In Windows 8, click the magnifying glass at the top of the screen and type “Magnifier”.
Feeling artistic? Try Paint. It’s not Photoshop, but you can do some basic photo editing and image creation in this free Windows program. One of the best features to me is the ability to crop and rotate photos in Paint. If you receieve an e-mailed photo which is upside down, this is an easy way to fix that. I use that feature often for clients when I’m on the road. Paint also has your choice of brushes and shapes, fill tools, outline tools, and the ability to type using the text tool in a desired color. It’s basic, but still helpful. If you’re ready to give it a shot, in Windows 7 click “Start”, “All Programs”, “Accessories”, “Paint”. In Windows 8, click the magnifying glass and type “Paint”. I’m sure you’re noticing a pattern here.
If you have a broken arm and can’t type, make sure you check out the On-Screen Keyboard! The On-Screen Keyboard is a keyboard displayed on your computer screen that allows you to click the keys on the displayed keyboard with your mouse instead of using the physical keyboard. I suppose it’s helpful if your actual keyboard is broken or if you have a touch screen device, but you’ll probably prefer to use your current keyboard. Nevertheless, it’s there, and you can use it if the need arises. If you’re feeling adventurous, in Windows 7 click “Start”, “All Programs”, “Accessories”, “Ease of Access”, then “On-Screen Keyboard”. In Windows 8, click the magnifying glass and type “On-Screen Keyboard”. I know you’re onto the pattern now.
The last tool we’re going to explore is the Math Input Panel. This tool is probably the least known of the five tools we’ve looked at. The purpose of it is to “write” a complex math equation into the box and then insert it into a document. It’s a royal pain to type an equation into a word processing program, and this will take the work out of it for you. Simply hold the mouse and drag it as if you were “writing” the equation, and the corresponding text will show up in the box at the top of the window. If the wrong number or letter is displayed, click “Select and Correct” and click on what you’d like to fix. A window will pop up offering suggestions, and you can choose the correct one. Once things are as they should be, click “Insert”, and then paste it into a word processor. Voila! You didn’t have to insert an ungodly amount of symbols to make your math equation appear. One more time, if you’d like to use it, in Windows 7 click “Start”, “All Programs”, “Accessories”, then “Math Input Panel”. In Windows 8, say it with me, click the magnifying glass and type “Math Input Panel”.
There are many helpful tools included with your Windows installation. These five are only the tip of the iceberg. Feel free to explore for yourself things like Wordpad and Sound Recorder, and if you really want to annoy your friends launch the Narrator on their computer! We just missed April Fool’s Day, but there’s always next year. I hope you’ll find some of these “Easter Eggs” helpful in your daily effort to rule the computer.